又是时隔一年了,时间过得可真快,也完全没想到我会在携程没呆满一年就急匆匆的想出来,回头想想这小一年里发生的一切,颇具戏剧性,虽然大家都公认我们的开发主管是个奇葩,但,有时候我会不禁的去想,或许他是对的,我们都错了呢?
携程的岁月里,虽然没有被我们开发主管认可,虽然我们理念上不合,但,通过不断的跟进和学习,也使得我在iOS这个平台上散发出了自己的光和热。今天的博文是继续说一说pjsip,原因是收到了不少网友的邮件来向我咨询这方面的问题,我也希望通过这样一个小小的示例,能真真切切的帮助到大家。
建立并配置项目
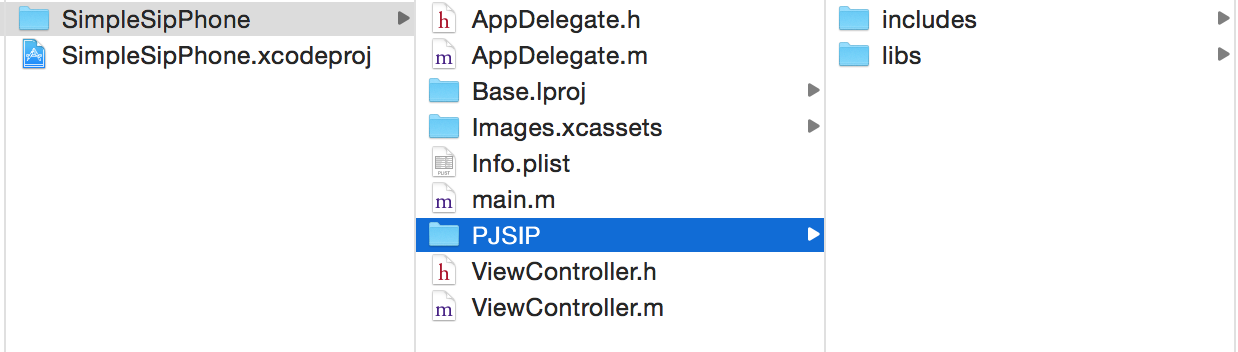
首先我们建立一个iOS的项目SimpleSipPhone,并将pjsip的库文件拷贝到项目根目录下,目录结构如下图:
![目录结构]()
其中includes文件夹中为所有的头文件目录,libs文件夹中为所有的静态库,然后我们将这个目录添加到项目中(_注意:includes文件夹不要添加到项目中来,只需添加libs文件夹,但我们仍需保证上图中的目录结构_),在项目工程配置中,我们配置targets为SimpleSipPhone的Build Settings,有以下几个配置:
- Header Search Path:
- $(PROJECT_DIR)/SimpleSipPhone/PJSIP/includes/pjlib
- $(PROJECT_DIR)/SimpleSipPhone/PJSIP/includes/pjlib-util
- $(PROJECT_DIR)/SimpleSipPhone/PJSIP/includes/pjmedia
- $(PROJECT_DIR)/SimpleSipPhone/PJSIP/includes/pjnath
- $(PROJECT_DIR)/SimpleSipPhone/PJSIP/includes/pjsip
- Other Linker Flags: -ObjC
- Preprocessor Macros: PJ_AUTOCONF=1
在Build Phases中的Link Binary With Libraries中添加下面几个Framework:
- AudioToolbox
- AVFoundation
按照上面的配置,我们就可以正常的使用pjsip库了,Command+B编译下你的工程,如果有警告或错误,那就说明你的配置可能出现了问题。
构建界面
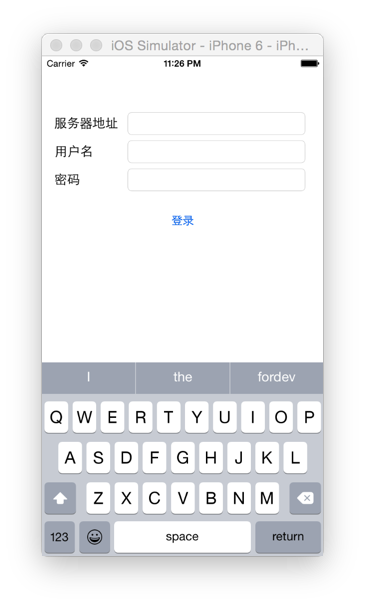
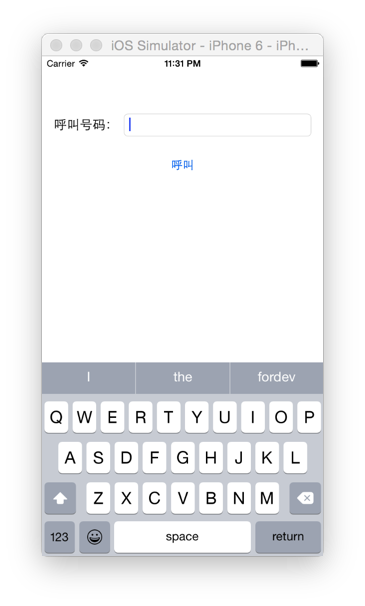
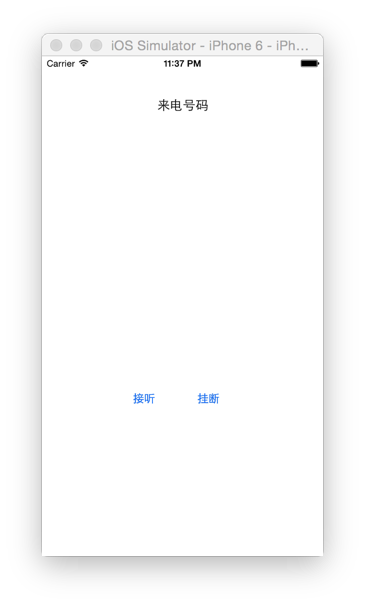
关于怎么做出美观而好用的界面,我这里就不赘述了,下面是我们最终要做出来的几个简单页面:
![]()
![]()
![]()
好了,相信大家都会觉得我所做出来的这些个界面很坑爹,不过没关系,今天的主要焦点还是放在功能实现上,界面是可以让大家自己自由发挥的。
pjsua api 使用以及说明
终于到了写代码的时候了,相信大家对Coding的兴趣远远大于界面设计,那么就从这里开始吧!
初始化pjsua
我们这里直接使用的API基本都是来自pjsua,这个是建立在pjsip基础之上的一层纯C封装,会比直接使用pjsip方便很多。在我们建立的项目中的AppDelegate里:
#import <pjsua-lib/pjsua.h>
在应用启动时,我们创建并初始化pjsua:
1
2
3
4
5
6
7
8
9
10
11
12
13
14
15
16
17
18
19
20
21
22
23
24
25
26
27
28
29
30
31
32
33
34
35
36
37
38
39
40
41
42
43
44
45
46
47
48
49
50
51
52
53
54
55
56
57
58
59
60
61
62
63
64
65
66
67
68
69
70
| - (BOOL)application:(UIApplication *)application didFinishLaunchingWithOptions:(NSDictionary *)launchOptions {
pj_status_t status;
status = pjsua_create();
if (status != PJ_SUCCESS) {
NSLog(@"error create pjsua"); return NO;
}
{
pjsua_config cfg;
pjsua_media_config media_cfg;
pjsua_logging_config log_cfg;
pjsua_config_default(&cfg);
cfg.cb.on_incoming_call = &on_incoming_call;
cfg.cb.on_call_media_state = &on_call_media_state;
cfg.cb.on_call_state = &on_call_state;
cfg.cb.on_reg_state = &on_reg_state;
pjsua_media_config_default(&media_cfg);
media_cfg.clock_rate = 16000;
media_cfg.snd_clock_rate = 16000;
media_cfg.ec_tail_len = 0;
pjsua_logging_config_default(&log_cfg);
#ifdef DEBUG
log_cfg.msg_logging = PJ_TRUE;
log_cfg.console_level = 4;
log_cfg.level = 5;
#else
log_cfg.msg_logging = PJ_FALSE;
log_cfg.console_level = 0;
log_cfg.level = 0;
#endif
status = pjsua_init(&cfg, &log_cfg, &media_cfg);
if (status != PJ_SUCCESS) {
NSLog(@"error init pjsua"); return NO;
}
}
{
pjsua_transport_config cfg;
pjsua_transport_config_default(&cfg);
status = pjsua_transport_create(PJSIP_TRANSPORT_UDP, &cfg, NULL);
if (status != PJ_SUCCESS) {
NSLog(@"error add transport for pjsua"); return NO;
}
}
status = pjsua_start();
if (status != PJ_SUCCESS) {
NSLog(@"error start pjsua"); return NO;
}
return YES;
}
|
具体代码的含义可以看注释和官方文档,这里我们所有的回调函数暂时都用空实现,Command+R,运行我们的程序,如果出异常了,那么你要好好检讨下了,为什么你总是不成功?^_^,如果你运气和我一样好,那么你会看到类似下面的日志输出:
1
2
3
4
5
6
7
8
9
10
11
12
13
| 11:28:29.141 os_core_unix.c !pjlib 2.3 for POSIX initialized
11:28:29.142 sip_endpoint.c .Creating endpoint instance...
...(此处省略)
11:28:29.157 pjsua_core.c .pjsua version 2.3 for Darwin-14.3/x86_64 initialized
11:28:29.157 pjsua_core.c .PJSUA state changed: CREATED --> INIT
11:28:29.157 pjsua_core.c SIP UDP socket reachable at 192.168.8.100:58261
11:28:29.158 udp0x7fcd78460 SIP UDP transport started, published address is 192.168.8.100:58261
11:28:29.158 pjsua_core.c PJSUA state changed: INIT --> STARTING
11:28:29.158 sip_endpoint.c .Module "mod-unsolicited-mwi" registered
11:28:29.158 pjsua_core.c .PJSUA state changed: STARTING --> RUNNING
|
OK,我们的初始化算是完成了,通过日志我们可以看到,pjsua监听了本地的一个UDP端口,这个端口我们是可以配置死的(pjsua_transport_config),但如果不配置,pjsua会随机选择一个未被占用的端口,这样挺好,否则应用可能会Crash掉。
回调函数配置
这里,我把所有的回调函数都包装成通知对外发布,这里需要注意下,所有的通知都放到了主线程中哦:
1
2
3
4
5
6
7
8
9
10
11
12
13
14
15
16
17
18
19
20
21
22
23
24
25
26
27
28
29
30
31
32
33
34
35
36
37
38
39
40
41
42
43
44
45
46
47
48
49
50
51
52
53
54
55
56
57
58
59
60
61
62
63
64
65
66
| static void on_incoming_call(pjsua_acc_id acc_id, pjsua_call_id call_id, pjsip_rx_data *rdata) {
pjsua_call_info ci;
pjsua_call_get_info(call_id, &ci);
NSString *remote_info = [NSString stringWithUTF8String:ci.remote_info.ptr];
NSUInteger startIndex = [remote_info rangeOfString:@"<"].location;
NSUInteger endIndex = [remote_info rangeOfString:@">"].location;
NSString *remote_address = [remote_info substringWithRange:NSMakeRange(startIndex + 1, endIndex - startIndex - 1)];
remote_address = [remote_address componentsSeparatedByString:@":"][1];
id argument = @{
@"call_id" : @(call_id),
@"remote_address" : remote_address
};
dispatch_async(dispatch_get_main_queue(), ^{
[[NSNotificationCenter defaultCenter] postNotificationName:@"SIPIncomingCallNotification" object:nil userInfo:argument];
});
}
static void on_call_state(pjsua_call_id call_id, pjsip_event *e) {
pjsua_call_info ci;
pjsua_call_get_info(call_id, &ci);
id argument = @{
@"call_id" : @(call_id),
@"state" : @(ci.state)
};
dispatch_async(dispatch_get_main_queue(), ^{
[[NSNotificationCenter defaultCenter] postNotificationName:@"SIPCallStatusChangedNotification" object:nil userInfo:argument];
});
}
static void on_call_media_state(pjsua_call_id call_id) {
pjsua_call_info ci;
pjsua_call_get_info(call_id, &ci);
if (ci.media_status == PJSUA_CALL_MEDIA_ACTIVE) {
pjsua_conf_connect(ci.conf_slot, 0);
pjsua_conf_connect(0, ci.conf_slot);
}
}
static void on_reg_state(pjsua_acc_id acc_id) {
pj_status_t status;
pjsua_acc_info info;
status = pjsua_acc_get_info(acc_id, &info);
if (status != PJ_SUCCESS)
return;
id argument = @{
@"acc_id" : @(acc_id),
@"status_text" : [NSString stringWithUTF8String:info.status_text.ptr],
@"status" : @(info.status)
};
dispatch_async(dispatch_get_main_queue(), ^{
[[NSNotificationCenter defaultCenter] postNotificationName:@"SIPRegisterStatusNotification" object:nil userInfo:argument];
});
}
|
神马?!你的代码怎么写得这么挫?通知名称干嘛不定义成宏或枚举常量?我故意的,怎么样?为了让你们对代码有更多的修改欲望,我会留下一些点来让你们自己改善,这样,你的代码终归不是我这个DEMO可以比拟的嘛!(_懒就是懒,还说得这么冠冕堂皇!_)
登录界面实现
首先,我们要监听注册相关通知,在SIP中,所谓的注册,就是将客户端的相关信息注册到服务器的一个类似路由表一样的列表中,这样其它客户端呼叫时,经过服务器的路由就可以找到正确的客户端地址,从而建立P2P的链接。所以,这里注册和一般意义上的登录还是有点区别的,不过,服务器可以对注册的账户进行验证(_这是可选的_),这种情况下,和一般的登录就非常相似了。
1
2
3
4
5
6
7
8
9
10
11
12
13
| - (void)viewDidLoad {
[super viewDidLoad];
[[NSNotificationCenter defaultCenter] addObserver:self
selector:@selector(__handleRegisterStatus:)
name:@"SIPRegisterStatusNotification"
object:nil];
}
- (void)dealloc {
[[NSNotificationCenter defaultCenter] removeObserver:self];
}
|
在我们的登录按钮触摸事件中,我们配置并完成对服务器的注册:
1
2
3
4
5
6
7
8
9
10
11
12
13
14
15
16
17
18
19
| pjsua_acc_id acc_id;
pjsua_acc_config cfg;
pjsua_acc_config_default(&cfg);
cfg.id = pj_str((char *)[NSString stringWithFormat:@"sip:%@@%@", username, server].UTF8String);
cfg.reg_uri = pj_str((char *)[NSString stringWithFormat:@"sip:%@", server].UTF8String);
cfg.reg_retry_interval = 0;
cfg.cred_count = 1;
cfg.cred_info[0].realm = pj_str("*");
cfg.cred_info[0].username = pj_str((char *)username.UTF8String);
cfg.cred_info[0].data_type = PJSIP_CRED_DATA_PLAIN_PASSWD;
cfg.cred_info[0].data = pj_str((char *)password.UTF8String);
pj_status_t status = pjsua_acc_add(&cfg, PJ_TRUE, &acc_id);
if (status != PJ_SUCCESS) {
NSString *errorMessage = [NSString stringWithFormat:@"登录失败, 返回错误号:%d!", status];
NSLog(@"register error: %@", errorMessage);
}
|
这里主要要注意这些个URI的格式,基本都是sip:username@server类似这样的格式。还有cfg.reg_retry_interval,这个是注册失败时,进行重试的时间间隔,如果不设置为0则它会不断进行尝试注册(_用户名密码验证失败也会如此_),这里为了不做复杂的类似超时这样的处理,直接将它设为0是很好的选择。
好了,现在就坐等回调了,回调中处理如下:
1
2
3
4
5
6
7
8
9
10
11
12
13
14
15
16
| - (void)__handleRegisterStatus:(NSNotification *)notification {
pjsua_acc_id acc_id = [notification.userInfo[@"acc_id"] intValue];
pjsip_status_code status = [notification.userInfo[@"status"] intValue];
NSString *statusText = notification.userInfo[@"status_text"];
if (status != PJSIP_SC_OK) {
NSLog(@"登录失败, 错误信息: %d(%@)", status, statusText);
return;
}
[[NSUserDefaults standardUserDefaults] setInteger:acc_id forKey:@"login_account_id"];
[[NSUserDefaults standardUserDefaults] setObject:self.serverField.text forKey:@"server_uri"];
[[NSUserDefaults standardUserDefaults] synchronize];
[self __switchToDialViewController];
}
|
这段代码还是很好理解的,我们简单的将账户ID和服务器地址存在了NSUserDefaults中,最后跳转到了拨号视图控制器。
拨号界面实现
首先,依然是添加通知监听,这次监听的是电话状态变更的通知:
1
2
3
4
5
6
7
8
9
10
11
12
| - (void)viewDidLoad {
[super viewDidLoad];
[[NSNotificationCenter defaultCenter] addObserver:self
selector:@selector(handleCallStatusChanged:)
name:@"SIPCallStatusChangedNotification"
object:nil];
}
- (void)dealloc {
[[NSNotificationCenter defaultCenter] removeObserver:self];
}
|
拨号的实现代码:
1
2
3
4
5
6
7
8
9
10
11
12
13
14
15
16
| - (void)__processMakeCall {
pjsua_acc_id acct_id = (pjsua_acc_id)[[NSUserDefaults standardUserDefaults] integerForKey:@"login_account_id"];
NSString *server = [[NSUserDefaults standardUserDefaults] stringForKey:@"server_uri"];
NSString *targetUri = [NSString stringWithFormat:@"sip:%@@%@", self.phoneNumberFiled.text , server];
pj_status_t status;
pj_str_t dest_uri = pj_str((char *)targetUri.UTF8String);
status = pjsua_call_make_call(acct_id, &dest_uri, 0, NULL, NULL, &_call_id);
if (status != PJ_SUCCESS) {
char errMessage[PJ_ERR_MSG_SIZE];
pj_strerror(status, errMessage, sizeof(errMessage));
NSLog(@"外拨错误, 错误信息:%d(%s) !", status, errMessage);
}
}
|
这里需要注意的还是URI的格式,我们这里将保存的服务器地址拿来拼接成合格的SIP URI,而在实际应用中,这样做并不总是可取的,其它客户端的服务器地址可能不是我们注册的服务器(_如经过PSTN网关_),这里只是简单给出一个提示,细节内容就靠大家自己去发现了。
挂断的实现代码:
1
2
3
4
5
6
7
8
| - (void)__processHangup {
pj_status_t status = pjsua_call_hangup(_call_id, 0, NULL, NULL);
if (status != PJ_SUCCESS) {
const pj_str_t *statusText = pjsip_get_status_text(status);
NSLog(@"挂断错误, 错误信息:%d(%s) !", status, statusText->ptr);
}
}
|
回调的实现代码:
1
2
3
4
5
6
7
8
9
10
11
12
13
14
15
16
| - (void)handleCallStatusChanged:(NSNotification *)notification {
pjsua_call_id call_id = [notification.userInfo[@"call_id"] intValue];
pjsip_inv_state state = [notification.userInfo[@"state"] intValue];
if(call_id != _call_id) return;
if (state == PJSIP_INV_STATE_DISCONNECTED) {
[self.actionButton setTitle:@"呼叫" forState:UIControlStateNormal];
[self.actionButton setEnabled:YES];
} else if(state == PJSIP_INV_STATE_CONNECTING){
NSLog(@"正在连接...");
} else if(state == PJSIP_INV_STATE_CONFIRMED) {
[self.actionButton setTitle:@"挂断" forState:UIControlStateNormal];
[self.actionButton setEnabled:YES];
}
}
|
至此,我们可以向外进行拨号通话咯,是不是很兴奋?是不是很想现在就试验下?好吧,你们私下里试验吧!我就不掺合了~
来电界面实现
来电是神马?来电是当你在任何界面、任何操作下都有可能发生的一种行为,是不是很恐惧?好像要做好会花不少心思呢,soga,那就简单的放在AppDelegate里吧!
在AppDelegate里添加来电通知的监听:
1
2
3
4
5
6
7
8
| - (BOOL)application:(UIApplication *)application didFinishLaunchingWithOptions:(NSDictionary *)launchOptions {
[[NSNotificationCenter defaultCenter] addObserver:self
selector:@selector(__handleIncommingCall:)
name:@"SIPIncomingCallNotification"
object:nil];
...(略)
|
监听代码实现如下:
1
2
3
4
5
6
7
8
9
10
11
12
13
| - (void)__handleIncommingCall:(NSNotification *)notification {
pjsua_call_id callId = [notification.userInfo[@"call_id"] intValue];
NSString *phoneNumber = notification.userInfo[@"remote_address"];
UIStoryboard *storyboard = [UIStoryboard storyboardWithName:@"Main" bundle:nil];
IncomingCallViewController *viewController = [storyboard instantiateViewControllerWithIdentifier:@"IncomingCallViewController"];
viewController.phoneNumber = phoneNumber;
viewController.callId = callId;
UIViewController *rootViewController = self.window.rootViewController;
[rootViewController presentViewController:viewController animated:YES completion:nil];
}
|
OK,我们简单的将这个ViewController的属性赋值,然后弹了起来,试验一下吧,打个电话给自己看看,能不能弹出来一个界面。
在来电的视图控制器中,我们依然要监听电话变更通知,代码类似,就不贴出来了。
接听和挂断的实现:
1
2
3
4
5
6
7
| - (IBAction)answerButtonTouched:(id)sender {
pjsua_call_answer((pjsua_call_id)self.callId, 200, NULL, NULL);
}
- (IBAction)hangupButtonTouched:(id)sender {
pjsua_call_hangup((pjsua_call_id)self.callId, 0, NULL, NULL);
}
|
OK,到这里,这个DEMO的所有编码工作就完成了,接下来,就测试下吧!
测试
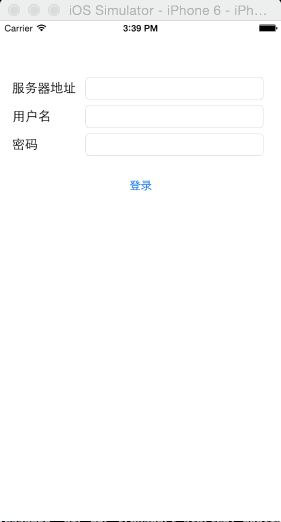
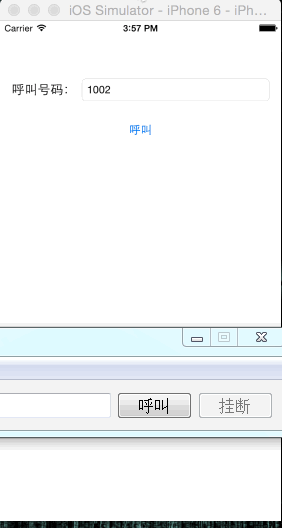
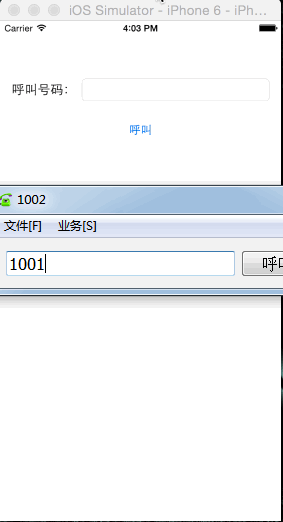
我们还是用上篇文章中的SIP服务器和客户端来测试,试验截图如下:
![登录测试]()
![外拨测试]()
![接听测试]()
接下来该干嘛
通过这样一个小小的DEMO,我们基本可以完成“楼上楼下,电灯电话”的小康生活了,但这远远不够,少年郎实现一个VOIP不是你想象中那么简单滴,我们还需要注意以下问题:
来电冲突,你正在和你小秘打着电话,这时候你老婆来电话了,你该怎么办?或者你偷偷的用你自制的这个语音电话和你小秘通话呢,你老婆直接用手机给你呼了个电话,你又该怎么办?这时候,你需要CoreTelephony框架来做支持,监听相应通知,做好一切的清场工作。
自动应答振铃,当我们收到对方的来电时,按照标准的SIP协议,我们必须要自动应答一个180,代表当前客户端正在振铃,如果不做这样的应答,这个来电很快就会被服务端认为无效而关闭。
1
| pjsua_call_answer(call_id, 180, NULL, NULL)
|
多线程调用,pjsip的线程管理也是比较复杂的,在非初始化pjsip的线程上调用pjsip的方法,需要对该线程进行附加,可以用类似以下代码来处理:
1
2
3
4
5
6
7
8
9
10
11
12
| void pjsip_execute_in_block(void(^)(void) block) {
pj_thread_desc rtpdesc;
pj_thread_t *thread = 0;
if(!pj_thread_is_registered()) {
if (pj_thread_register(NULL, rtpdesc, &thread) == PJ_SUCCESS) {
block();
}
} else {
block ();
}
}
|
挂断延迟问题,很多时候,我们调用了挂断后,可能都没什么反应,小伙子,这时候一定不要着急,可能对方把手机扔进了马桶或者直接摔了。也就是说,服务器没有收到对方的挂断应答,这时候会一直挂起,直到超时。通常,健全一点的SIP服务器都会有这样的超时设定(_推荐使用kamailio,开源且免费_)。
后台模式,iOS没办法让你完全掌控后台,这很蛋疼,如果没有更好的唤醒方式,你只能改用tcp的传输模式,并在应用的后台模式中加上Voice over IP,pjsip中相关处理参照官方这篇文档。
网络变更,当你从WIFI切到4G,当你家路由器突然挂掉了,你依然想和你当前通话的对象能正常的用4G交流感情,那你要参照官方这篇文章来进行相应处理了。
好了,这样就算是完备了,你需要好好设计和封装一下,争取做出一个通用、健壮和扩展性非常强的VOIP组件吧!(_到时候别忘了在我面前炫耀下哦_)
本篇文章对应的源码地址:https://github.com/prinsun/BlogDemo.SimpleSipPhone